


 1371
1371
With Metrc now implemented, your inbound manifests should be automatically pulled into KlickTrack for you to accept. However, there are occasional API sync issues with Metrc that can prevent KlickTrack from bringing in your latest manifest automatically. If this situation occurs, the fastest way to get your inventory into KlickTrack is for you to manually create an inbound manifest. In this article, we will walk you through the manifest creation process step-by-step so that you can get your new inventory into KlickTrack.
Step 1: Create a manifest in KlickTrack
- You must receive the manifest in Metrc first. Instructions for how to do so can be found here.
1. Log In to KlickTrack and go to Dashboard > Inventory Management > Inbound Manifests.
2. Select the blue plus (➕ ) sign in the bottom right-hand corner.
3. Utilizing the information from your manifest, enter the necessary information:
-
Enter a Manifest Name
-
Enter the Manifest No.
-
Select vendor by entering the vendor's name, MME, or UBI into the search bar.
-
On your Metrc manifest, this will be the "Originating Entity."
-
-
Enter the Departure and Arrival date using the Calendar icon.
-
Enter the Departure and Arrival time using the Alarm icon.
-
Enter the Delivery Route information.
-
Select the Delivery Type and enter the corresponding information into the fields associated with that delivery type.
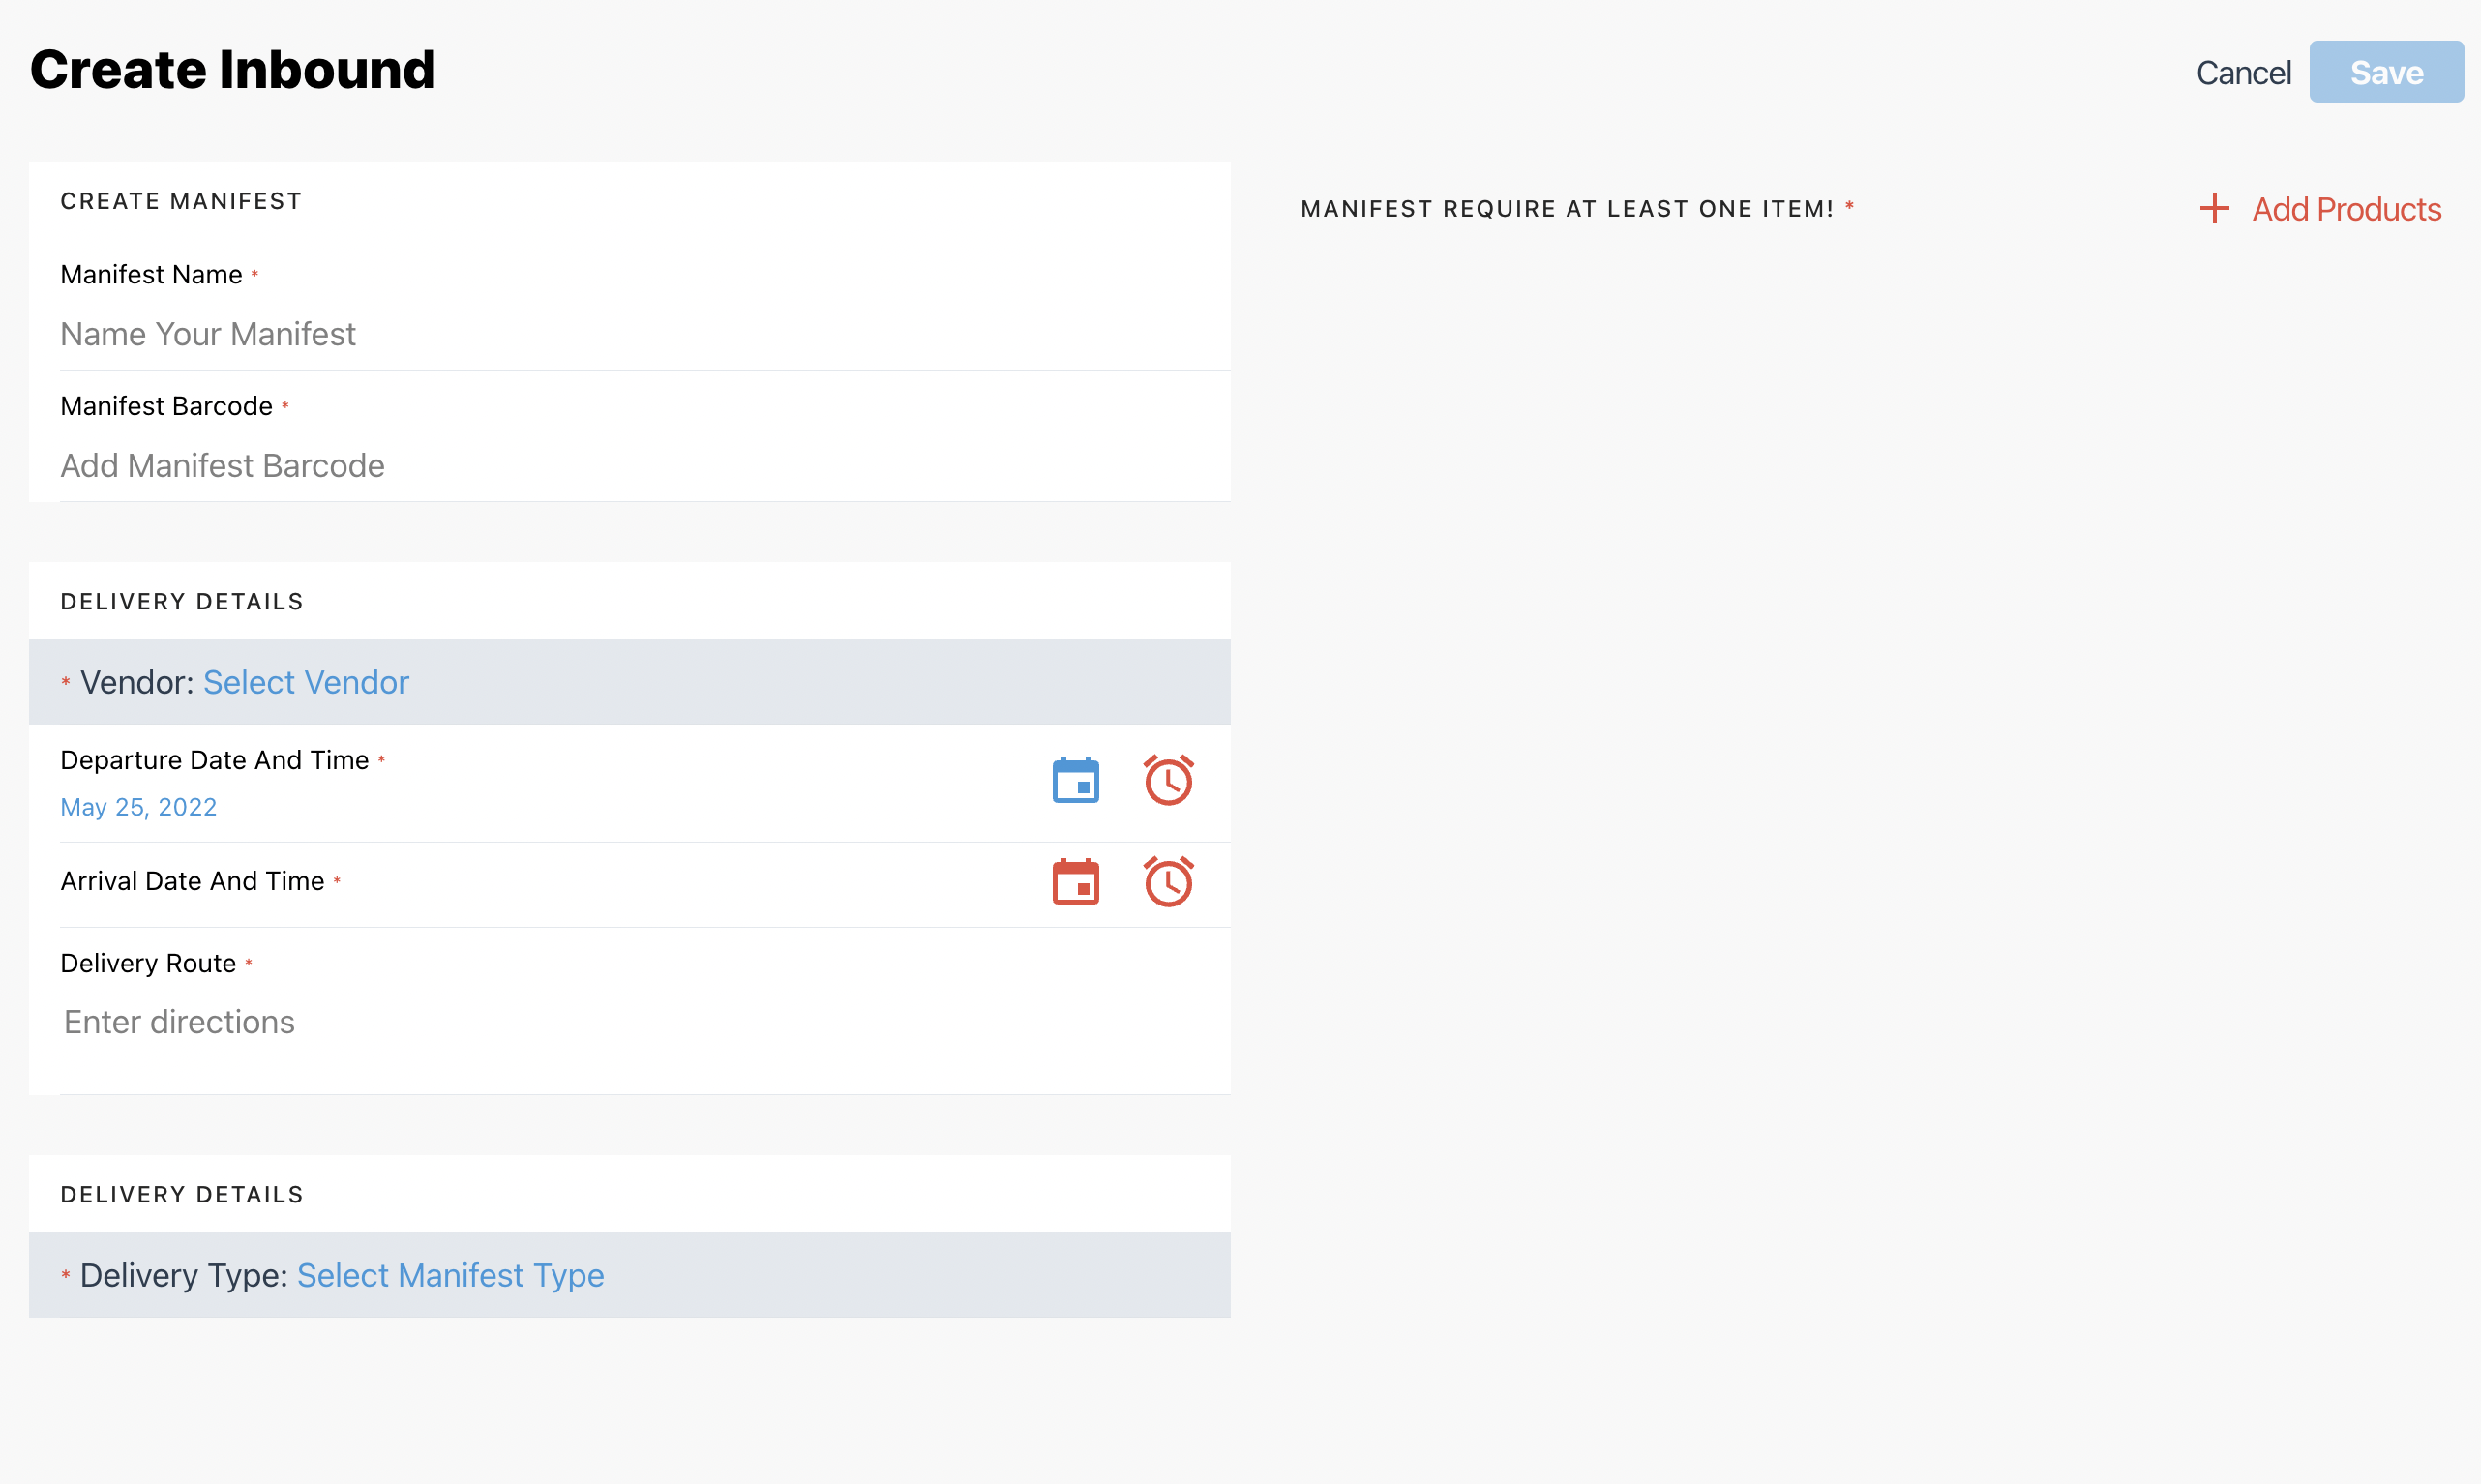
4. Next, add the items from your manifest by selecting the "+Add Products" button in the upper right corner of your screen and fill in the necessary information:
-
Enter the product name into the search bar and select the desired item.
-
Enter a product SKU / register barcode into the "Add package SKU" field
- Next, enter your 24-digit Metrc package ID number into the Purchase SKU field.
-
Do NOT select Copy Pkg in the modal.
-
Double-check that the number is accurate, as an incorrect package number will result in reporting errors. We will not be able to submit a sales receipt for any product that has an incorrect Metrc package tag ID.
-
-
In the field that has a price tag:
-
Enter the product price ($0.00) into the calculator modal
-
Click "Add Order"
-
-
In the field that has a weight measurement:
-
Enter the received quantity
-
Click "Add Order"
-
5. Repeat Step 4 until all items have been added to the manifest.
6. Once you have finished adding all of the items, click "Save" to close out the page and add your newly created manifest to the "In Transit" manifest list.
Step 2: Accept the Manifest in KlickTrack
1. Select the desired manifest from the list of inbound manifests found under the "In Transit" status. This will open the manifest detail page for the selected manifest.
2. On the Manifest page detail page, you can click on a package to edit and/or add package details.
3. If all packages are "Complete," double-check to ensure that all information is accurate.
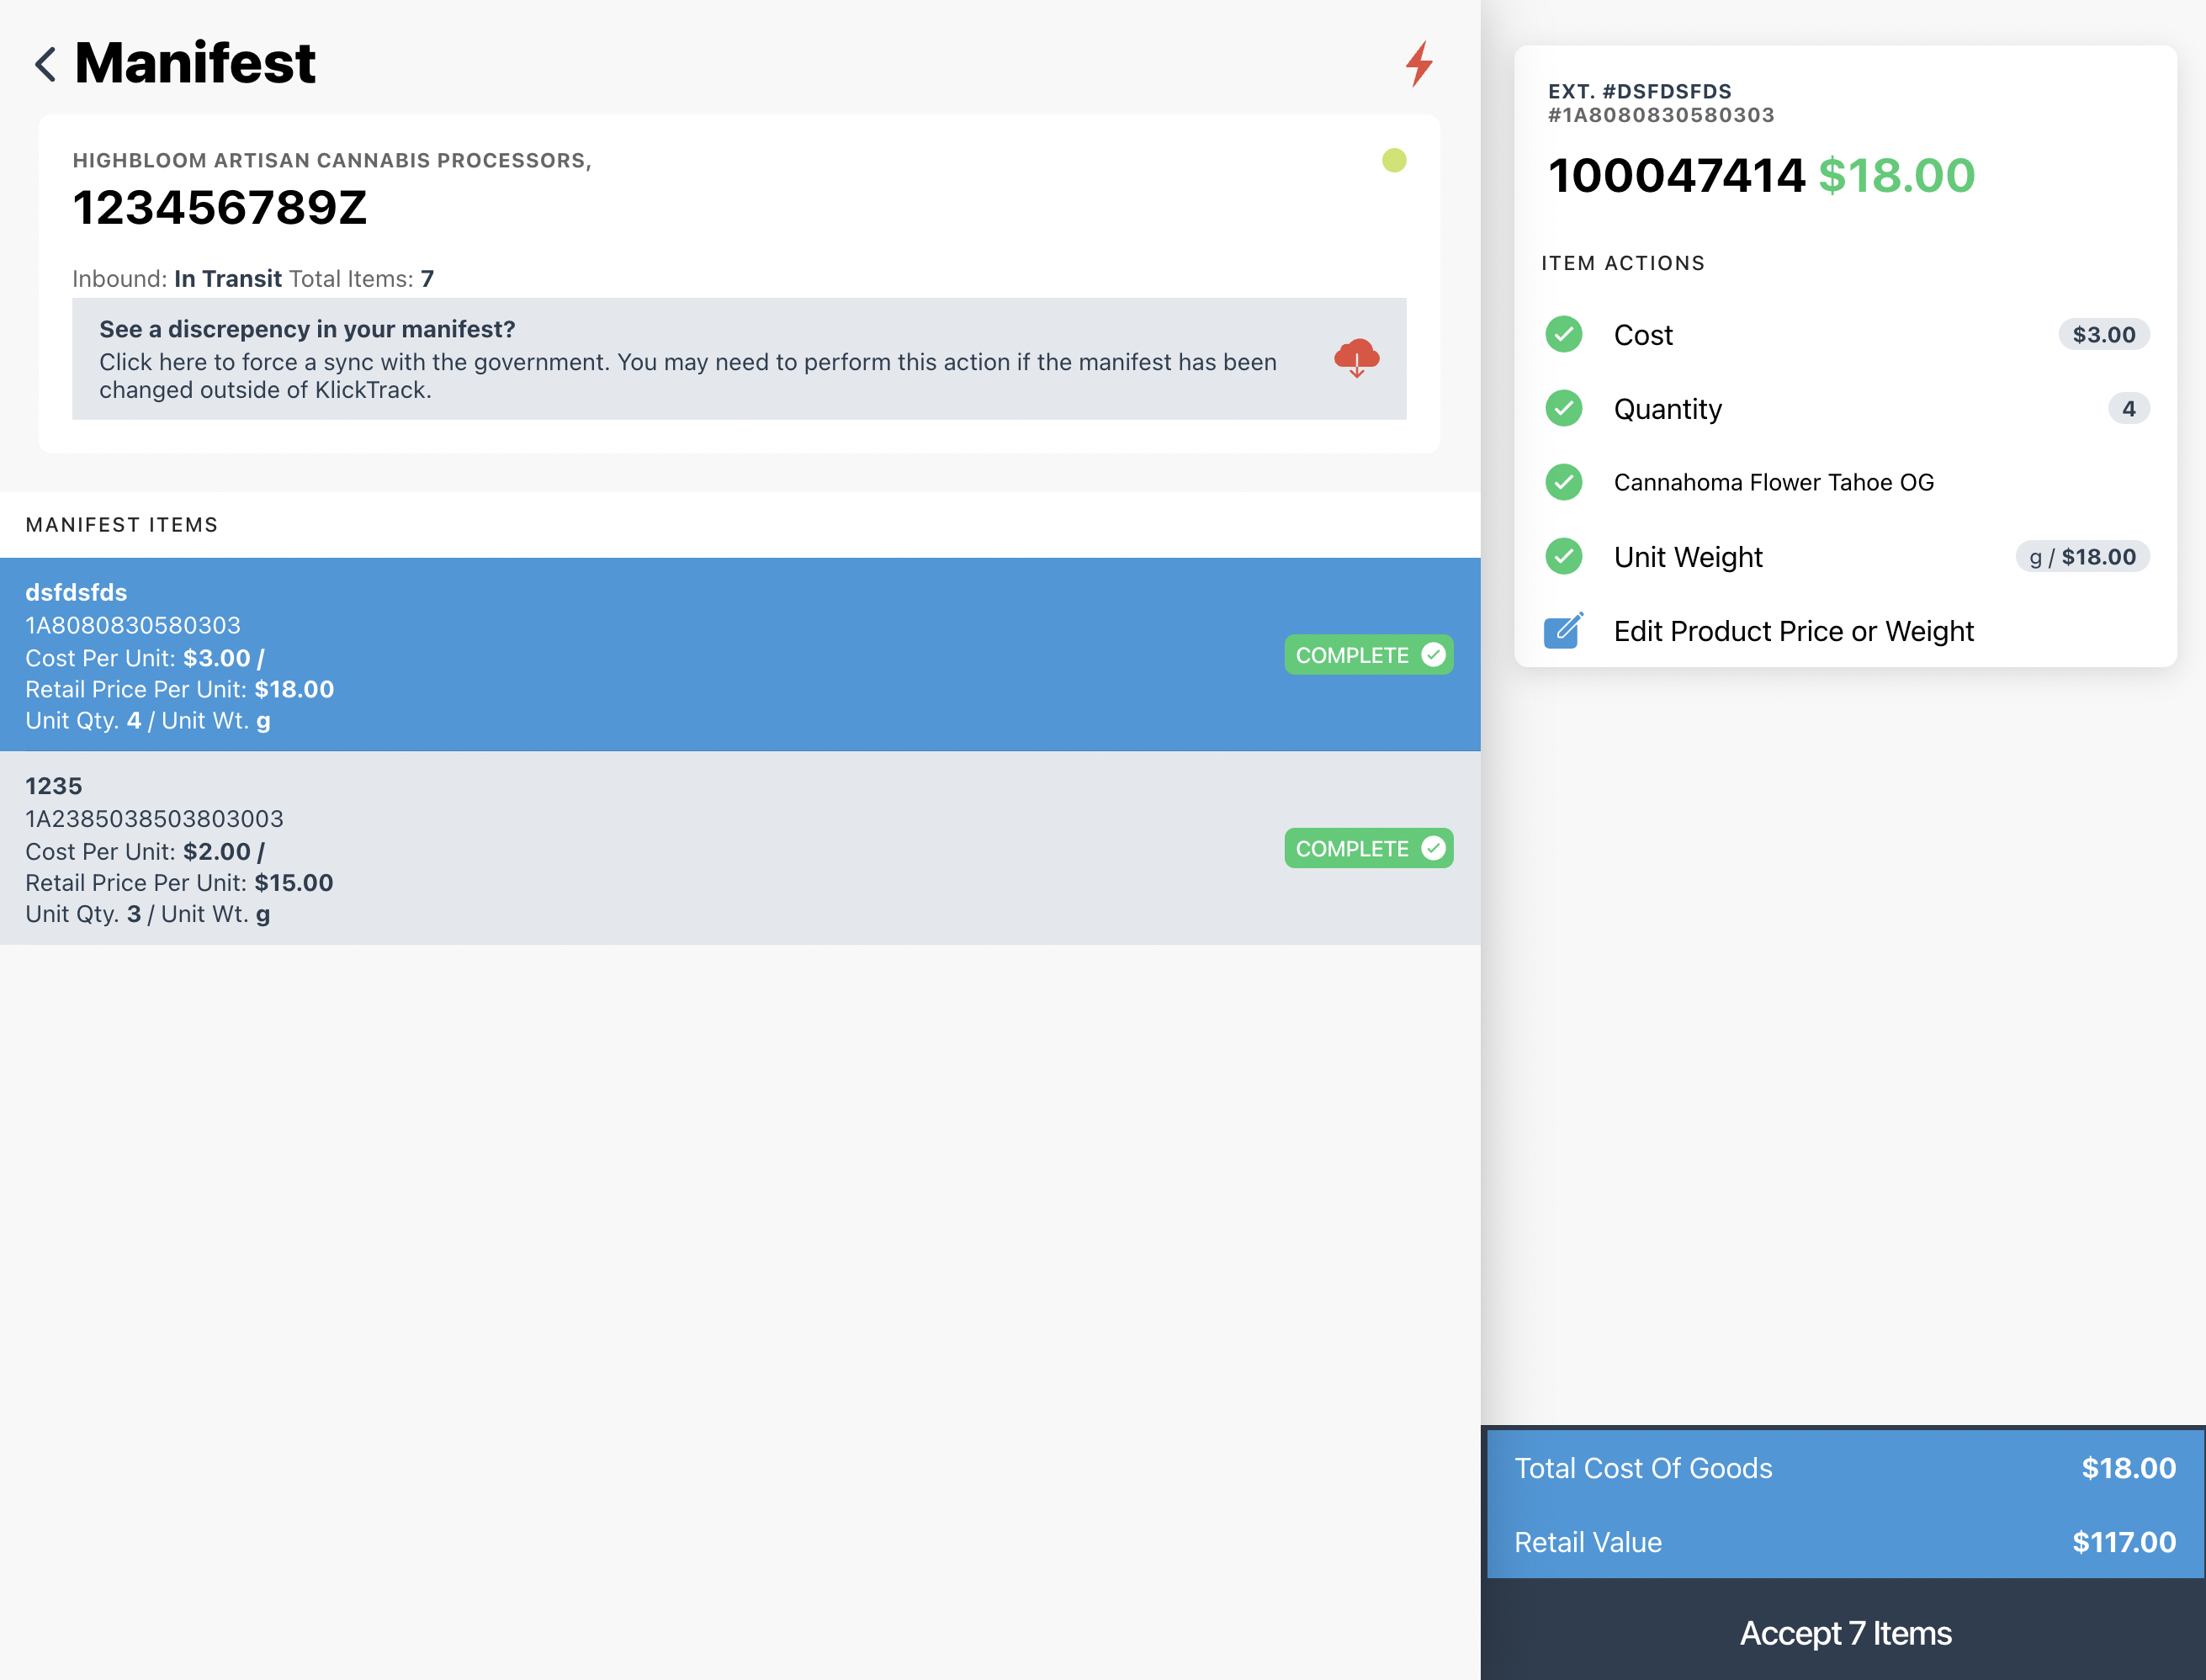
4. Click the "Accept Items" button on the bottom right of the screen to accept manifest and bring the products into your KlickTrack inventory.
FAQs & Troubleshooting Tips
1. I accidentally put the Metrc Package ID's into the wrong field when creating the manifest. How do I resolve this?
To resolve this issue, please email to submit a ticket to KlickTrack support with the manifest ID, the name of the products that have an incorrect Metrc Package Tag ID, and the correct Metrc Package Tag ID numbers. Our team will update the information for you in the back-end of our system.

