


 472
472
Is this functionality available for iPad and web browsers?
As of version 2.14.9 of the KlickTrack Retail App, label printing functionality is available from within the native iOS app running on the iPad.
Which label printers do we support?
Our solution is currently configured to work with the Zebra ZD41022 label printer utilizing 2x1 thermal Transfer labels.
The 2.14.9 release of the app supports TCP connectivity (Wired Ethernet or WiFi, if the printer supports it). This version does not yet support Bluetooth connectivity for label printers.
Our support for Receipt printers remains unchanged.
Section 1: Calibrating your Zebra Printer
Calibrating your Zebra ZD410 printer will help prevent your labels from printing off-center or running off the edge.
- Press the power button and wait for the solid green status indicator light.
- Hold the pause and cancel buttons down for 2-3 seconds and let go. This will adjust the printer head to your paper alignment. This process may take a few seconds, and the printer may feed out a few blank labels.
- The calibration is complete once the printer stops and the status indicator light is solid green.

Section 2: Find Your Label Printer Address
- After connecting your Zebra Printer to your network via Ethernet Cable, follow the instructions in the manual for the Zebra ZD410 label printer to print a Configuration Report.
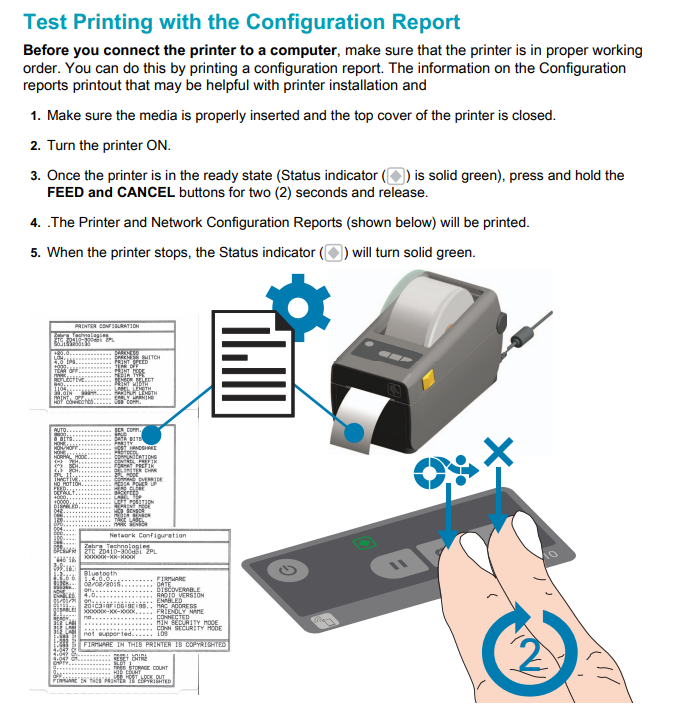
- Record the “IP Address” listed on the printed receipt (e.g.
10.33.11.220).
Section 3: Configure your Label Printer on the KlickTrack iPad Application
- Install version 2.14.9 or higher of the KlickTrack retail app on your iPad.
- Launch the KlickTrack retail app on your iPad.
- On the left-side menu, navigate to the “Printers” page of the app.
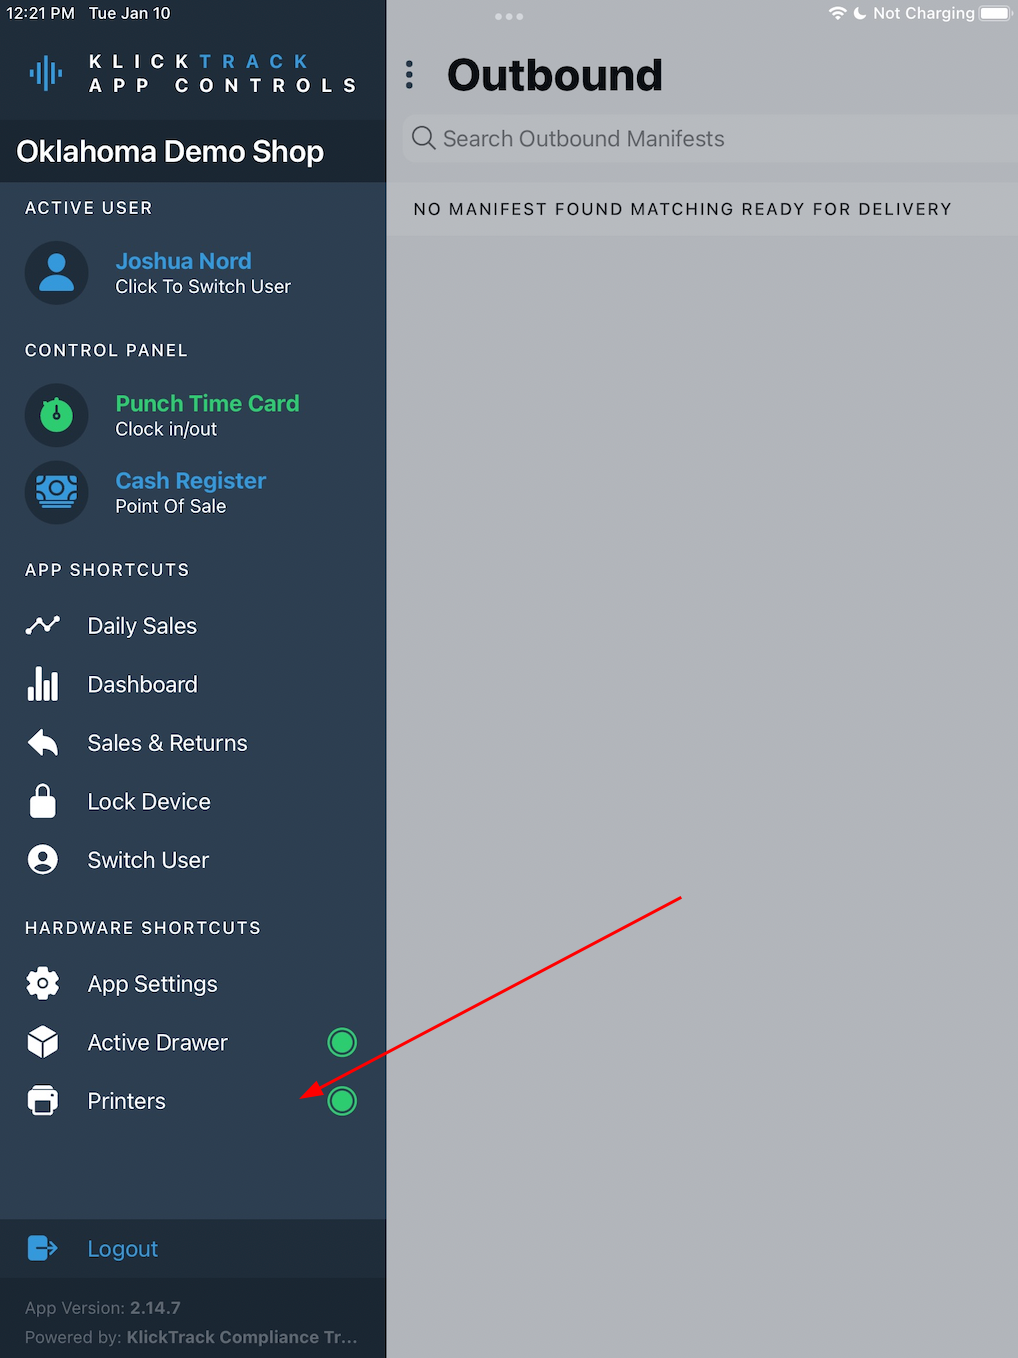
- The Printers page has a
Label Printercard
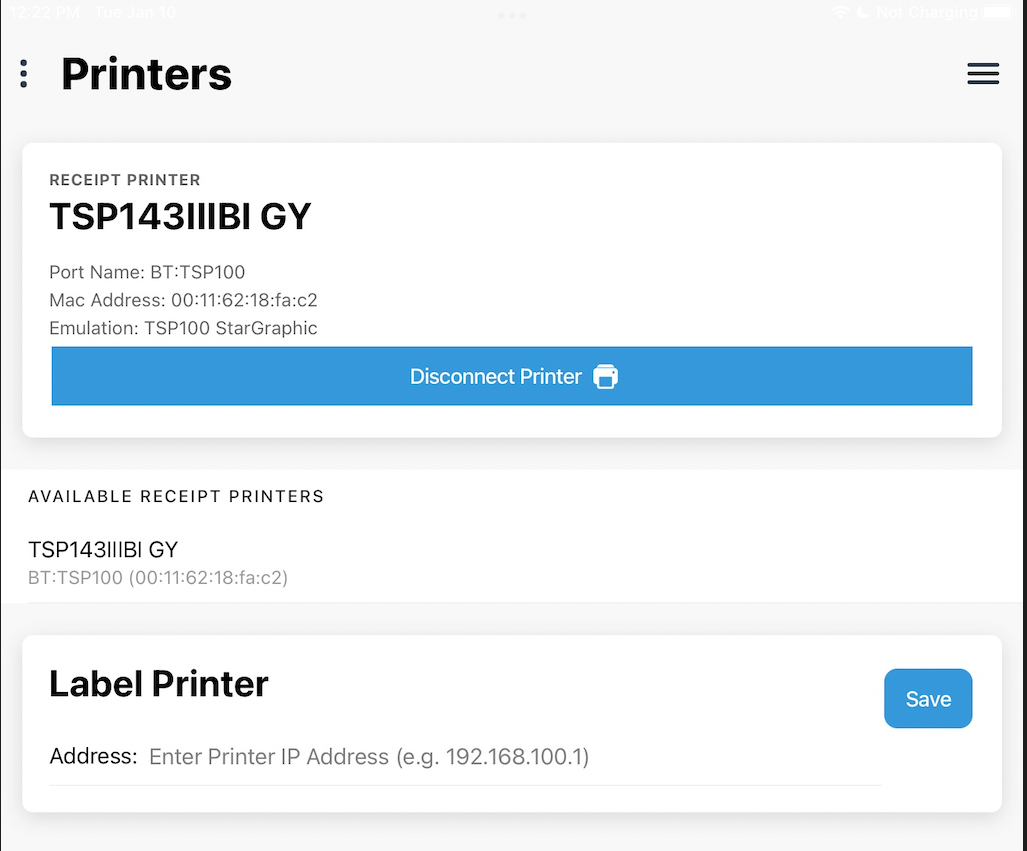
- Type in the IP Address of your Label Printer, as obtained from the instructions above.
- Click the “Save” button.
- You have now configured your Label Printer and can use the menu to navigate back to the Cash Register!
Printing "Deli Style" exit labels for bulk flower
- Navigate to the Register on your device.
- Find and select the bulk flower product you will weigh and package.
- Once you’ve selected your product, click the gram (g) selection on the product weight bar. This action will prompt the scale weight modal to appear so you can enter the bulk product weight.
- Weigh the bulk product on your scale, and then manually enter the purchase weight of the bulk product into the modal and press the “Add Scale Weight” button.
- A print preview of the label will pop up so that you can review and verify that all the information is correct before printing.

-
Click the "Print Label" button on the label preview. Your label should print to your specified printer and close the preview dialog box.

