


 1523
1523
We know that having a barcode scanner that can accurately scan various barcode types is a must-have for most retail operations. This is why we’ve developed a new scanner app that is faster, more reliable, and customizable.
This article will guide you through setting up and connecting our new KlickTrack scanner, including:
- How to download the new scanner app
- Set up the scanner & connect to a register drawer
- Disconnect and/or Switch Register Drawers
- Troubleshooting Tips
To learn more about using our new scanner, please check out our article here.
Overview
KlickTrack’s new scanner app is built specifically to be used alongside our POS system. Our scanner is 100% wireless and does not rely on Bluetooth or hardwired cables. Additionally, no additional hardware is needed to get your new scanner up and running; all you need to do is download our new app.
Download the new scanner app
You will need to download our new scanner app, “KlickTrack Scanner 3.0”, from the Apple app store to utilize the new scanner.
❗Before you start ❗
▪ You should download the new scanner app to the device you will be using as a scanner.
▪ If you have more than one scanner device, you will want to download the app onto each device.
▪ You must have at least one employee set up in KlickTrack to create the necessary devices.
-
Sign to the Apple App Store on your device using the Apple ID that you used to download the KlickTrack register app.
-
Search for “KlickTrack Scanner 3.0” in the App Store.
-
Download the new scanner app to your device.
Set up the scanner & connect to a register drawer
Our new wireless scanner app simplifies the process of registering a new scanner device and connecting it to your register drawer. See the instructions below for more details.
❗Before you start❗
To set up and create your new scanner device, you will need an active register device with an active drawer set up already and access to both the scanner and register devices.
1. Log in to KlickTrack and navigate to Dashboard > Hardware Management > Devices on your already set-up register device (i.e. set to a register device type). Make sure that you have an active drawer set-up.
2. Next, click the blue plus sign (➕) to pop the device registration modal with “Scanner” as the default Device Type.
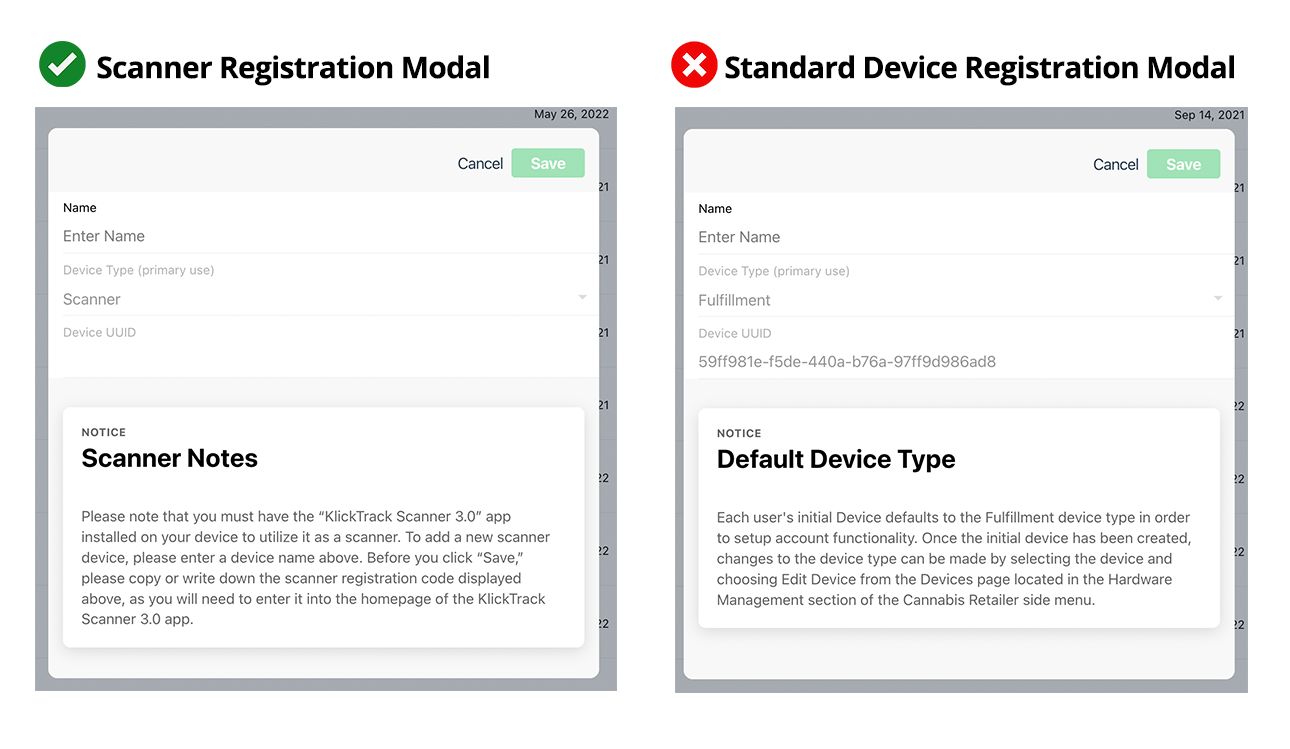
3. In the scanner registration modal, enter a scanner device name into the “Name” field and click “Save.”
4. Find your newly created scanner device in the device list and click on it.
5. Select “Edit Device” ; this will re-open the scanner registration modal.
-
In the re-opened registration modal, locate your scanner registration code denoted in green.
6. 📱Switch over to your scanner device and open the “KlickTrack Scanner 3.0” app.
-
In the “Registration Code Box,” enter the registration code from the modal. Note that the registration code is not case-sensitive.
-
Click the “Submit” button.
-
You will now see a screen that informs you that you must connect a register drawer to proceed.
7. Next, switch back over to your register device and go to the register homepage.
8. At the top of the menu side of the register, you will see a row of icons; click the bracket icon. This will pop a modal with a QR code.

9. 📱 Switch back to the scanner device, click on “Link a drawer,” and scan the QR code in the register modal. Once the scanner has connected, you will see the register drawer’s name appear at the top of the scanner interface.
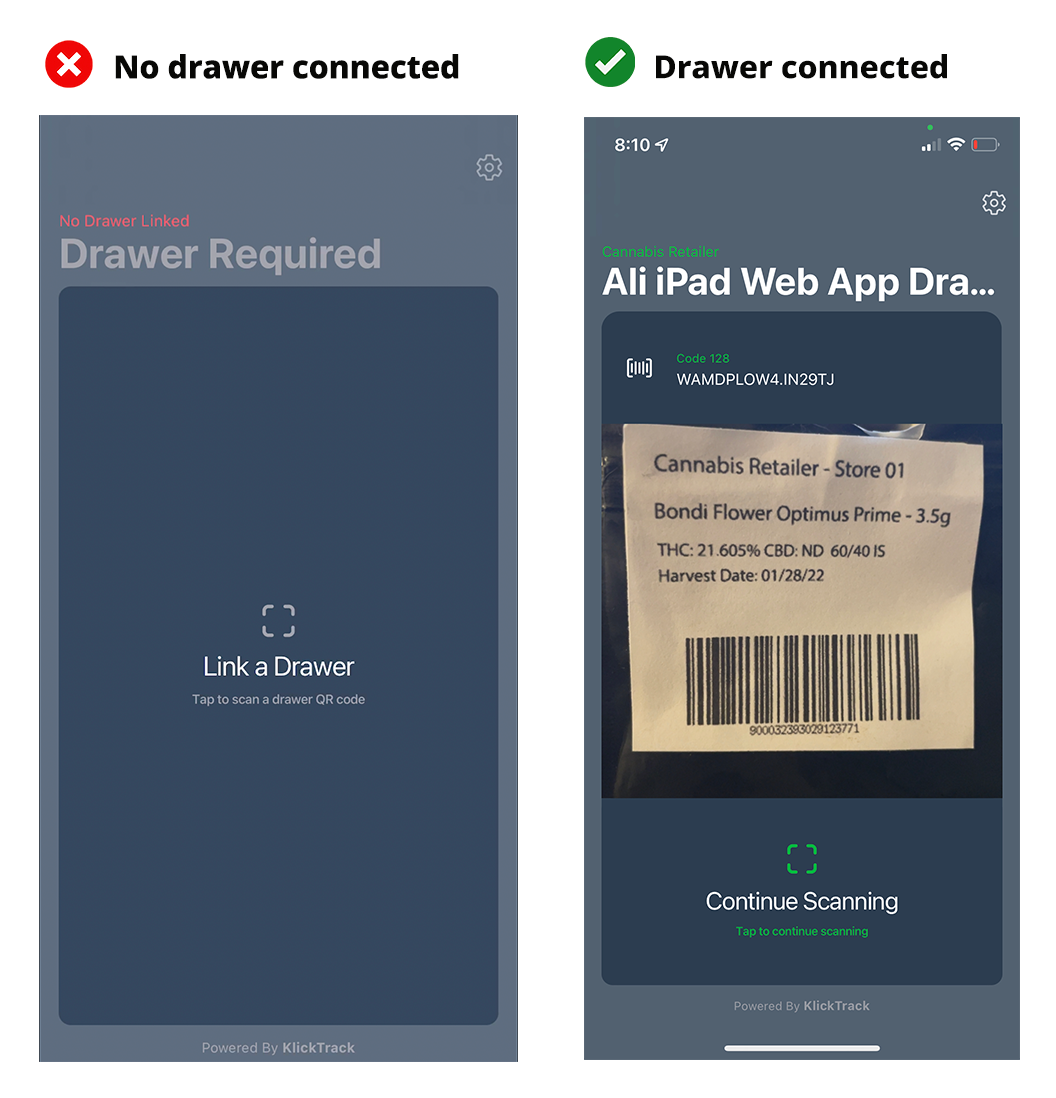
Your scanner is now connected to your register drawer!
Disconnect and/or Switch Register Drawers
The register drawer connection to the scanner will remain active until you either detach or end your active drawer, OR if you manually disconnect the drawer from the scanner. See the instructions below for more details.
To disconnect your register drawer from the scanner:
-
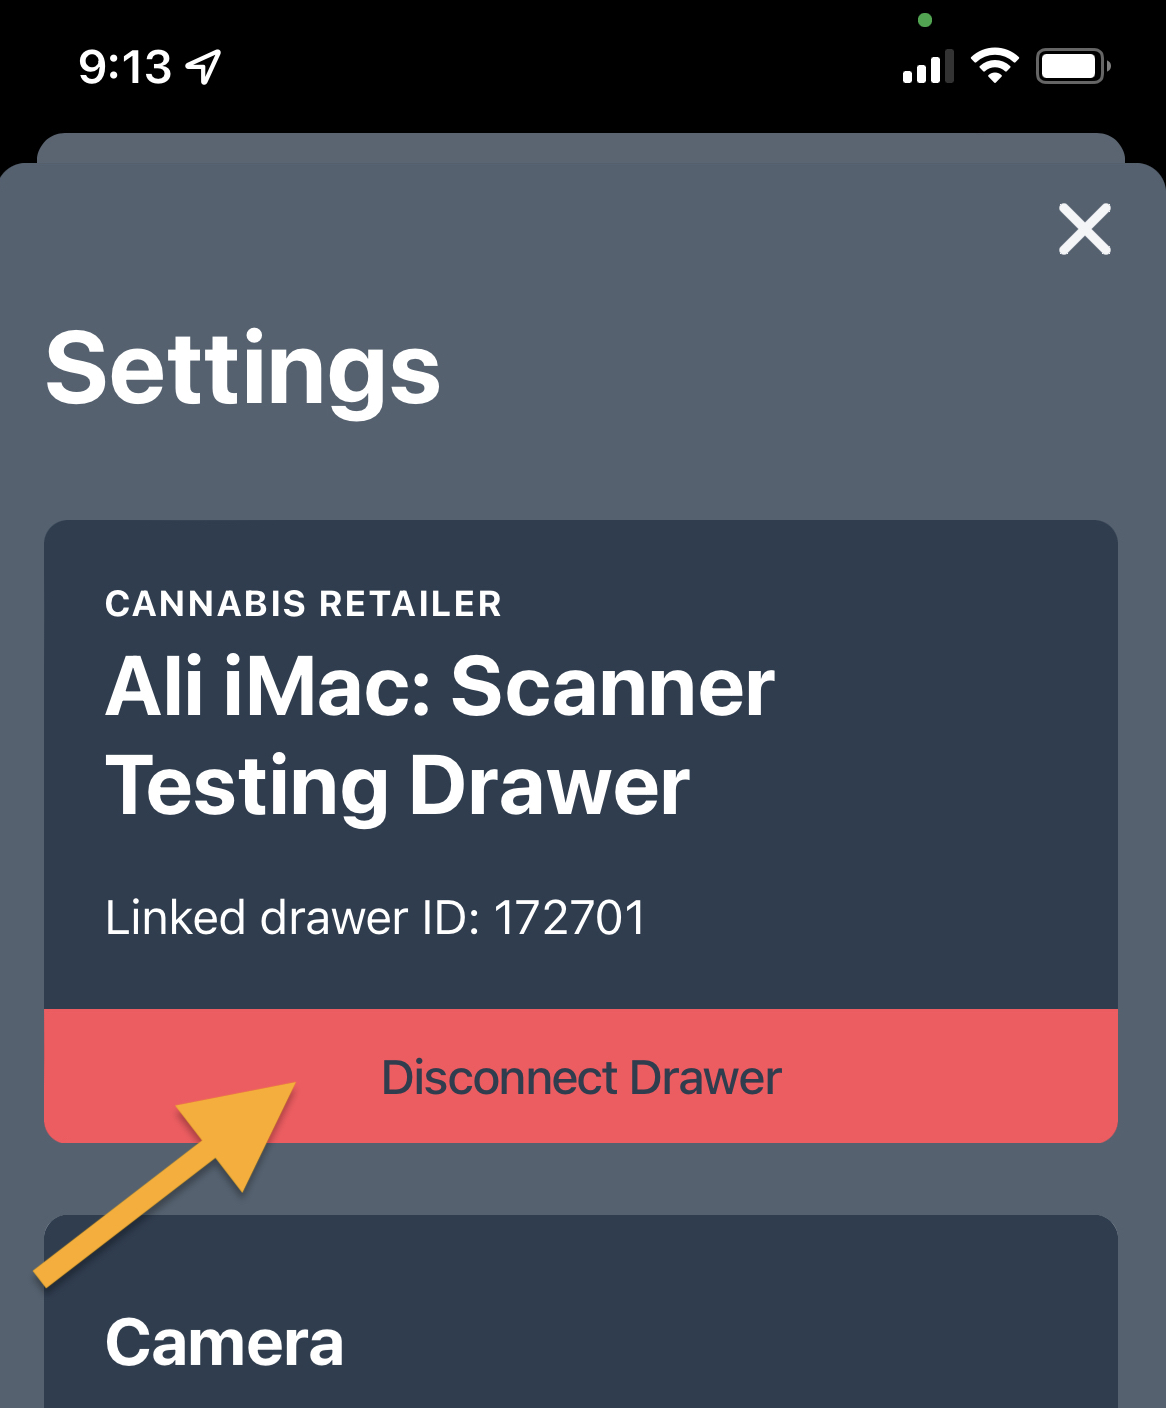
Click the gear icon (⚙) in the upper right area of the scanner. This will open the scanner settings.
-
Click the “Disconnect Drawer” button.
-
This will close the scanner settings modal and return you to the main scanner area.
To switch between register drawers:
-
Disconnect the register drawer
-
Follow steps 5-7 in the "Set up and Connect Scanner" instructions above to connect a new drawer.
1. When I clicked on the QR code I got an error message that said I need to create a drawer first even though I have a drawer connected. How do I resolve it?
This error message often means that your register device is not seen by the system as being active. To re-activate a register:
- Go to Dashboard> Hardware Management > Devices
- Find the register device you wish to re-activate and click on it, this will pop the device registration modal
- In the device registration modal make sure your device is set to register and then click "Save".
- Then go to Drawers (also under Dashboard > Hardware Mgt ) and open your active drawer. Take no actions in here, just open it and then use the arrow on the right to back out.
Now if you return to the register homepage and click on the bracket icon, the QR code modal should show that you have a connected drawer that can be scanned to. If you scan it with your scanner, it should connect as outlined above.
If the above does not work, please check your device list on the register and make sure that you are only associated with one active device. This is because a physical device can only exist as one Device Type at a time.
- If more than one Device Type is assigned to a physical device then it must be deleted and the cache cleared.
- Once that occurs you can re-create the register device using the normal "Add Device" path.
2. When I try to connect the scanner to a drawer, I get an error message that says, “Drawer not valid or active! Please try again”. How do I resolve it?
If you received this error, it is likely due to one of the scenarios outlined below:
Scenario 1: The drawer you are trying to connect to is not active.
-
To troubleshoot this scenario, go to Hardware Management > Devices, locate the register device you want to connect to, and confirm that the device is linked to a drawer.

- If there is no linked drawer listed with your register device, you must first connect the device to an active drawer. Once the register and drawer are linked, you can proceed with connecting the drawer and scanner.
Scenario 2: (for multi-store operators only) Your scanner device and register device are not in the same environment/shop.
- Your register device and drawer must be in the same environment/shop where you created your scanner device. If this is the source of your issue, then the fix is simple; all you need to do is create a scanner app in the same environment/shop as your register device.
Next Article > How to utilize the scanner and customize your scanner settings

